
Share This Article
Discover how to make friendship bracelets through straightforward guidance, imaginative designs, and simple patterns suitable for all expertise levels. These bracelets have been a treasured pastime, symbolizing camaraderie and artistic expression. Whether creating one for yourself or as a sincere present, mastering the technique of fashioning these vibrant adornments is both pleasurable and satisfying. This comprehensive manual offers all the essentials to begin, encompassing necessary materials and mastering diverse patterns.

Essential Materials for Constructing Friendship Bracelets
Prior to commencing your bracelet, assemble these indispensable tools and resources:
Advertisement
🔥 Fast & Free Download

- Embroidery Floss: Offered in a vast spectrum of shades, embroidery floss constitutes the core of every friendship bracelet.
- Securing Aids: Employ masking tape, a clipboard, or a safety pin to firmly hold your bracelet in position as you craft.
- Scissors: A quality pair of scissors guarantees neat and precise thread cuts.
Expert Advice: Snip generous lengths of floss—approximately 36 to 72 inches—depending on whether you’re doubling threads for loops or using single strands.
Step-by-Step Creation Process
Explore how to fashion friendship bracelets with detailed, step-by-step directions, from perfecting fundamental knots to producing intricate chevron and diamond designs.
1. Understanding the Core Knots of Friendship Bracelets
Comprehending the four basic knots is vital, as they are the building blocks for all friendship bracelet creations:
Forward Knot Technique
- Create a forward knot by shaping a “4” with the left strand positioned over the right.
- Guide the left strand beneath and through the loop formed by the “4.”
- Secure the knot by pulling the thread upward toward the right while keeping the right strand taut.

Backward Knot Technique
- Form a backward “4” by placing the right strand over the left.
- Pass the right strand under and through the backward “4.”
- Tighten the knot to the left, ensuring the left strand remains taut.
Combining Forward and Backward Knots
- Begin with a forward knot, followed by a backward knot using the same strand.
- This knot alters the direction of the active strand.
Combining Backward and Forward Knots
- Initiate with a backward knot, then execute a forward knot using the same strand.
- Similar to the forward-backward knot, this reverses the working strand’s orientation.
Once you’ve mastered these, you can confidently approach any bracelet pattern.
2. Simple Bracelet Designs Ideal for Beginners
Let’s delve into beginner-appropriate bracelet designs, starting with elementary two-strand bracelets and progressively advancing to more elaborate patterns.
Two-Strand Friendship Bracelet
This uncomplicated bracelet employs only forward knots and two strands.
Preparation:
- Cut two 36-inch strands of floss in contrasting colors.
- Affix a basic overhand knot at the top, leaving a small loop for clasping.
Method:
- Using one strand, tie a forward knot around the other. Repeat with the opposing strand.
- Alternate between strands to achieve a woven appearance.
Completion:
- Once the desired length is achieved, secure the ends with a knot and trim any excess.

This design is excellent for honing your forward knot proficiency.
3. Creating a Spiral Staircase Bracelet
The spiral staircase bracelet showcases a playful, spiraling effect and utilizes only one knot type.
Preparation:
- Choose 3–4 colors and cut each to 36 inches.
- Tie a knot at the apex, making sure to leave a small loop for closure.
Method:
- Select a single strand to work with and repeatedly tie forward knots around the remaining strands.
- As you proceed, the spiral design will naturally materialize.
Customization:
- Change colors at any juncture for a multicolored spiral.
- Repeat until you attain your preferred bracelet length.

4. Constructing a Candy Stripe Bracelet
This diagonal stripe design introduces multiple strands and builds upon the forward knot.
Preparation:
- Cut four 36-inch strands of floss in varying colors.
- Arrange the strands in your chosen sequence and secure them with tape or a clipboard.
Method:
- Starting with the leftmost strand, tie forward knots over each subsequent strand in the row.
- Once you’ve utilized all the strands in the row, begin again with the next leftmost strand.
Advice:
- The color order will dictate the diagonal stripe pattern.
- Ensure you pull knots tightly for a uniform design.

5. Transitioning to Intermediate Designs
As your comfort level increases, experiment with designs that integrate a combination of forward and backward knots.
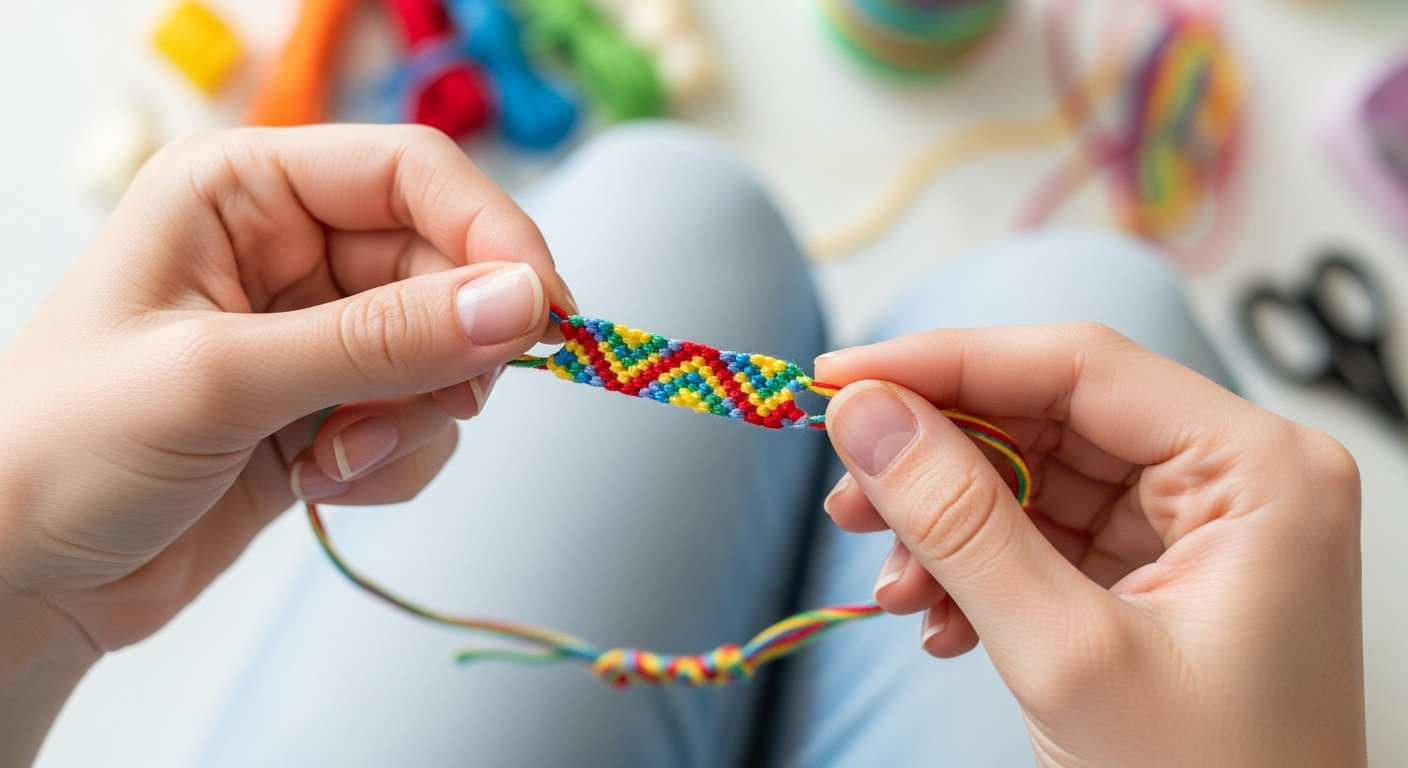
Chevron Friendship Bracelet Creation
The chevron design is a quintessential V-shaped pattern that necessitates mirrored knots.
Preparation:
- Employ four distinct colors, doubled to yield eight strands, ensuring the outermost strands are identical.
Method:
- Work from the outermost strands inward, executing forward knots on the left side and backward knots on the right.
- When the two central strands converge, tie a forward-backward or backward-forward knot to unite them.
Styling:
- Modify the spacing and row count for a tighter or looser chevron aesthetic.
6. Crafting a Diamond Friendship Bracelet
The diamond design entails complex patterns and precise threading. It’s a striking bracelet that showcases your crafting prowess.
Preparation:
- Cut four 72-inch strands of floss in diverse colors.
- For the outer diamond colors, cut an additional 10 inches of floss, as these strands will be used more extensively.
- Double the strands to create eight threads and secure with a looped knot at the top.
Arranging Threads:
- Mirror the threads so that the outermost colors match, followed by pairs of identical colors moving inward.
Making the Diamond:
- Begin with the two center threads and tie a backward knot to establish the diamond’s apex.
- On the right side, employ the rightmost thread to tie forward knots over the other threads until it reaches the center.
- On the left side, employ the leftmost thread to tie backward knots over the other threads until it meets the right thread in the middle.
- Unite these two center threads with a backward-forward knot.

Filling the Diamond:
- Utilize the next pair of threads to form an inner diamond shape by adhering to the same steps as above, but halting before the edges.
Repeat and Expand:
- Continue this process to incorporate more diamond layers, adjusting the knot placement as you progress.
Finishing:
- Fasten off the bracelet when you attain the desired length and trim the ends.
This design may demand additional practice but yields a captivating geometric effect.
Tips for Overcoming Challenges and Refining Your Bracelets
Even with experience, obstacles can surface while crafting friendship bracelets. Here are some frequent issues and how to resolve them:
Inconsistent Tension
- Problem: Some segments of the bracelet are looser than others.
- Solution: Practice maintaining consistent knot tightness. Pull each knot snugly without excessive force, which can skew the pattern.
- Problem: Threads become tangled or knotted during the process.
- Solution: Employ shorter working lengths for intricate designs or secure the strands with clips to maintain organization.
Insufficient Thread Length
- Problem: A strand becomes too short before finishing the bracelet.
- Solution: Introduce a new strand by tying a small knot at the back of the bracelet. Avoid conspicuous joins on the front.

Finishing Touches for Friendship Bracelets
Upon completing the bracelet, you’ll want to secure and neaten it. Here are some favored techniques:
- Securing with a Knot: Tie a simple overhand knot at the bracelet’s end, leaving a few inches of strand for tying around your wrist.
- Braided Ends: Divide the remaining strands into three sections and braid them. Tie a knot at the end to secure the braid.
- Loop-and-Knot Closure: Integrate a loop at the starting point and form a large knot at the end. This enables the bracelet to fasten securely through the loop.
Experimenting with Colors and Designs
As your confidence grows, experiment with these ideas to personalize your bracelets:
- Color Palettes: Incorporate ombre effects, complementary hues, or even metallic strands for a contemporary flair.
- Beads and Embellishments: Insert small beads or charms between knots for an enhanced design.
- Pattern Blending: Merge multiple designs, such as candy stripes with chevrons or diamonds.
Sharing and Preserving Your Creations
Friendship bracelets are more than just crafts—they’re mementos. Here’s how to treasure and share them:
- Presenting as Gifts: Offer them as heartfelt presents to friends and family.
- Displaying Your Work: Wear them or showcase them as wall decor by affixing them to a decorative pinboard.
- Passing on Your Knowledge: Share your skills by instructing others in the art of bracelet creation.
Final Wording:
Crafting friendship bracelets is a timeless activity that brings joy to both the creator and the recipient. From basic two-strand designs to elaborate diamond patterns, there’s something for every skill level. With dedication, patience, and imagination, you can master these designs and create bracelets that are as unique as your friendships.
Now, gather your supplies, select your favorite design, and begin crafting! Happy bracelet-making!
Frequently Asked Questions About DIY Friendship Bracelets
Uncover everything about DIY friendship bracelets, from materials to techniques, in this comprehensive FAQ guide for creative crafting.
1. What length should I cut the strings for my bracelet?
Cut the strings approximately four times the circumference of the wrist you’re making the bracelet for. For a wrist measuring 17 cm, cut strings about 68 cm long. Include extra length for tying knots at the ends.
2. What’s the simplest way to secure the ends of the bracelet?
The easiest method is to gather all the strands at the end and tie a large overhand knot. For added assurance, leave about 2–3 cm of strand for the knot.
3. How can I prevent my strands from tangling?
To minimize tangling, work with organized strands. Secure the ends with tape or clips, and use shorter lengths for complex designs to reduce excess strand.
4. Can I use other types of strand besides embroidery floss?
Embroidery floss is recommended for its resilience and color selection, but you can experiment with yarn, crochet strand, or even thin paracord for different textures and effects.
5. How do I correct errors in my bracelet design?
If you spot a mistake, gently untie the incorrect knots using a pin or needle. Avoid pulling too vigorously to prevent fraying or damaging the strands.
6. Is it acceptable to combine different types of knots in one bracelet?
Absolutely! Blending forward, backward, and combination knots can produce unique designs. Experiment with various techniques to craft your own personalized look.
7. What are the most effective methods to stabilize my bracelet while I work on it?
Use masking tape to adhere the top to a table, a safety pin to fasten it to your clothing, or a clipboard to keep it stationary. These techniques help maintain stability as you work.
8. Can I integrate beads or charms into the design?
Yes, beads and charms can be threaded between knots for added ornamentation. Ensure the holes are adequately sized for your floss to pass through easily.
9. How do I ensure the bracelet is the perfect fit?
Measure the recipient’s wrist, then add approximately 2–3 cm for tying. Adjust the length during crafting by periodically wrapping it around the wrist to verify.
10. What’s the optimal way to care for my bracelet after making it?
To preserve the bracelet’s condition, avoid prolonged exposure to moisture, and gently cleanse it with a damp cloth if necessary. Store it in a dry environment when not in use.

