
Share This Article
Table of Contents
My journey into creating sensory bottles from scratch has been truly transformative. These wonderfully simple, yet impactful creations have not only kept my children entertained for countless hours, but have also sparked a sense of inventiveness in my everyday life. It all began on a particularly dreary afternoon when boredom was at an all-time high. Desperate for an activity, I recalled a conversation with a friend about sensory bottles. Armed with water, glitter, food coloring, and a handful of spare bottles, we were ready to embark on our little adventure.
The process proved to be surprisingly simple and deeply satisfying. We experimented with mixing different colors and incorporating various shimmering and intriguing items we discovered around the house. Watching the mixture swirl and gradually settle had a captivating effect on both of us. It was through the crafting of these sensory bottles that I uncovered a wonderfully straightforward method to connect with my children, while also providing them with a mechanism for self-soothing and exploration. Now, whenever we’re yearning for a touch of inventiveness or seeking a moment of tranquility, we reach for our sensory bottle supplies.
Advertisement
🔥 Fast & Free Download


I sincerely hope that my experience inspires you to consider making your own sensory bottles. It’s a simple and enjoyable activity that has the potential to infuse a sense of calmness and ingenuity into your life.
Unlocking the Benefits of Sensory Bottles
Sensory bottles, often referred to as calm-down jars, are much more than just a delightful DIY project. They fulfill a practical function and offer a multitude of advantages for both children and adults alike.
Benefits for Children
Cultivating Emotional Regulation
Sensory bottles can act as a valuable resource in assisting children to manage their emotions. When a child is feeling agitated or overwhelmed, shaking the sensory bottle and observing the contents swirl and gradually settle can produce a soothing effect. It offers a focal point for their attention, enabling them to block out excessively stimulating environments.
Facilitating Sensory Exploration
Children gain knowledge about the world through their senses. Sensory bottles can be filled with an array of materials to stimulate different senses, providing a secure and managed environment for sensory exploration. This can be particularly advantageous for children who experience sensory processing challenges.
Benefits for Adults
Alleviating Stress
Similar to children, adults can utilize sensory bottles as a means of stress reduction. Watching the movement of the contents within the bottle can serve to divert attention from stressful thoughts and encourage a sense of calm.
Encouraging Mindfulness Practice
Sensory bottles can also serve as a tool for mindfulness exercises. Focusing on the movement inside the bottle can aid in grounding the mind in the present moment, which is a fundamental aspect of mindfulness.
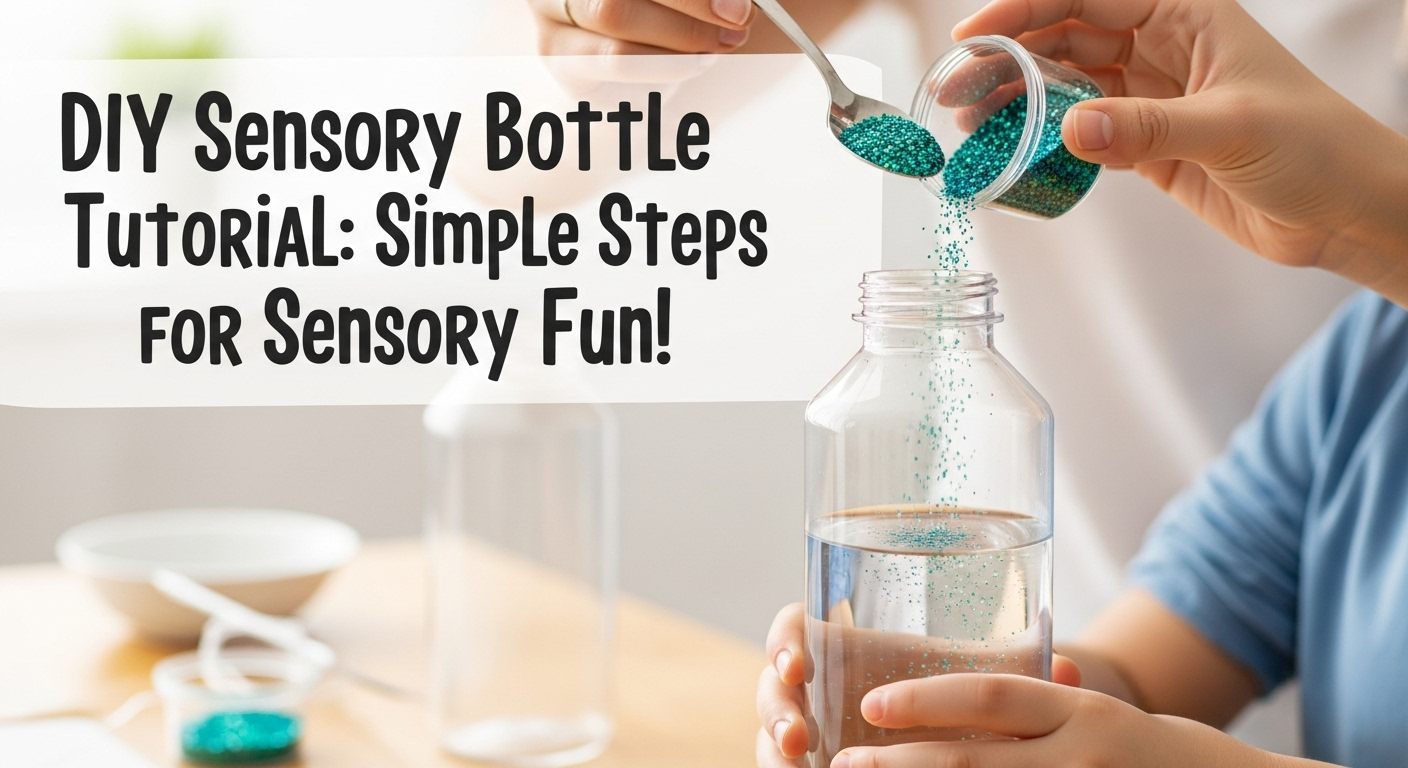
Creating Sensory Bottles: A Step-by-Step Guide
Craft a soothing sensory bottle for everyone, including individuals with special needs. Perfect for Autism, ADHD, Anxiety, and more. Let’s create one together.

Essentials for Your Project
- A transparent plastic bottle (prioritizing safety for children)
- Food coloring (optional, for tinting the water)
- Glitter (because a little sparkle elevates everything!)
- Sequins (for enhanced visual appeal)
- Water beads (for a captivating, texture-transforming element)
- Vegetable glycerine (to moderate the movement of your ingredients)
- Water
Detailed Instructions
Discover how to construct a sensory bottle with this user-friendly DIY guide below:
- Prepare Your Container: Begin by selecting a clear plastic bottle. Opting for plastic is recommended to ensure it is safe for children to handle without the worry of breakage.
- Fill Halfway with Water: Pour water into your bottle, filling it approximately halfway.
- Incorporate Color: Should you desire to add color to your sensory bottle, now is the time to introduce a few drops of food coloring. Remember, a little goes a long way; you can always incorporate more later if necessary.
- Mix Thoroughly: Secure the bottle’s lid and give it a vigorous shake to ensure the food coloring is consistently dispersed throughout the water.
- Add Glitter: The exciting part is adding glitter! Select your preferred glitter colors to introduce to your bottle.
- Introduce Sequins: Now add sequins to your bottle. You may want to select colors that complement the glitter you’ve already added.
- Incorporate Water Beads: Prior to adding water beads, ensure they have been immersed in water and have expanded. Add these to your bottle with care—they are known to bounce!
- Add Glycerine: Pour in the vegetable glycerine. The quantity you use will determine how gradually the items in your bottle move when shaken. More glycerine equates to slower movement.
- Top Off, Secure, and Shake: Fill the remaining portion of your bottle with water, leaving a small space at the top. Secure the lid and give your bottle a thorough shake. Observe the magic unfold as your sensory bottle comes to life.
- Personalize: Feel free to experiment with other items in your sensory bottle. Small toys, such as Lego pieces, can make for an interesting addition.
Prioritizing Safety
Once you are satisfied with your sensory bottle, you may want to permanently secure the lid with some super glue. This ensures that all the contents remain safely inside, particularly when in the hands of very young children.
Visual Guide
For a detailed video walkthrough on creating a sensory bottle, check out this YouTube video by Little Learners.
It complements this written guide seamlessly, offering a visual aid to the crafting process that enhances both clarity and engagement.
Crafting sensory bottles is more than just an activity; it’s an experience to share with your children, friends, or for your own mindful moment. These calming jars not only ignite joy with their swirling colors and sparkles but also function as a therapeutic tool for individuals of all ages. Embrace your creativity, and don’t hesitate to craft a sensory bottle that perfectly aligns with your or your loved one’s aesthetic and requirements.
Creative Variations and Inspiring Ideas for Sensory Bottles
Crafting sensory bottles is an enjoyable and inventive process. The possibilities are boundless, and you can tailor them to fit your specific needs or interests. Here are several distinctive and captivating ideas for sensory bottles:
Themed Sensory Bottle Ideas
Themed sensory bottles can be an excellent approach to involve children in learning about diverse topics. For instance, you could create a space-themed bottle with glitter and star-shaped sequins to educate about the solar system, or a nature-themed bottle with sand and small shells to explore the beach environment.
Multi-Sensory Bottles
While the majority of sensory bottles are visual, you can also craft bottles to engage other senses. For instance, a sound sensory bottle filled with rice or beads can be utilized as a noise maker, and a scent sensory bottle with essential oils can offer olfactory stimulation.
Interactive Sensory Bottle Concepts
Interactive sensory bottles foster active participation. You could create a “find it” bottle with hidden items inside that the child is tasked with finding, or a “make it move” bottle with items that move in intriguing ways when the bottle is tilted or shaken.
Seasonal Sensory Bottle Ideas
Seasonal sensory bottles can assist children in comprehending and celebrating different times of the year. You could craft a spring bottle with flower petals and a winter bottle with white glitter and snowflake confetti.
The secret to a fantastic sensory bottle lies in making it entertaining and engaging. Don’t be afraid to experiment with various materials and concepts. The most critical aspect is that the person utilizing the bottle finds the experience enjoyable.
Important Safety Considerations for Sensory Bottles
When crafting and utilizing sensory bottles, safety should be a paramount concern. Here are some essential safety considerations to keep in mind:
Selecting the Appropriate Bottle
The bottle you select is of utmost importance. It should be resilient and leak-resistant. Plastic bottles are frequently a safer option than glass, particularly for young children.
Ensuring a Secure Seal
To prevent the contents from spilling out and posing a choking hazard, ensure that the bottle is securely sealed. You can utilize a strong adhesive to seal the lid, and contemplate adding an additional layer of security with duct tape.
Choosing Safe Components
When selecting components for your sensory bottle, avoid small items that could present a choking hazard should the bottle break or leak. Additionally, be mindful of any allergies that the user may have.
Supervised Application
Particularly for younger children, sensory bottles should be utilized under adult supervision. This can avert any accidents and ensure that the bottle is being utilized safely.
Regular Examination
Periodically examine your sensory bottles for any indications of wear and tear. If a bottle is cracked or the seal is loosening, it is time to replace it.
Safety is of utmost importance. By adhering to these precautions, you can ensure that your sensory bottles provide an enjoyable and safe sensory experience.
Troubleshooting and Upkeep of Sensory Bottles
Crafting and utilizing sensory bottles is generally a straightforward process, but occasionally you may encounter some issues. Here are some common problems and their corresponding solutions:
Leakage Issues
If your sensory bottle is leaking, it may be attributable to a loose cap. To resolve this, ensure that the cap is tightly screwed on. If the problem persists, contemplate utilizing a strong adhesive to seal the cap.
Clumping Problems
Occasionally, the contents of the sensory bottle may clump together. This is frequently attributable to the type of filler utilized. To avert this, refrain from utilizing fillers that can absorb water, such as salt or sugar.
Color Fading
If the colors in your sensory bottle commence to fade, it could be attributable to exposure to sunlight. To maintain vibrant colors, store your sensory bottle in a cool, dark location when not in use.
Maintenance Guidelines
Regular upkeep can prolong the lifespan of your sensory bottle and maintain its optimal appearance. Here are some guidelines:
Routine Checks
Inspect your sensory bottle regularly for any indications of damage. If you observe any cracks or leaks, it is time to replace the bottle.
Cleaning Protocols
Maintain the exterior of your sensory bottle by wiping it down with a damp cloth. For the interior, it is best to replace the contents if they commence to appear dirty or cloudy.
A well-maintained sensory bottle can provide endless hours of calming entertainment.
Frequently Asked Questions About DIY Sensory Bottles
Explore answers to your frequently asked questions about DIY sensory bottles. Discover how to craft them, what materials to utilize, and how they benefit sensory development.
What defines a sensory bottle?
A sensory bottle, also known as a calm-down jar, is a container filled with materials intended to stimulate the senses. They can be utilized as a calming mechanism or as a means to engage in sensory exploration.
What is the process for creating a sensory bottle?
Creating a sensory bottle entails filling a resilient, leak-resistant bottle with an assortment of materials. This could encompass water, glitter, beads, sequins, oil, and more. The bottle is then sealed to prevent the contents from spilling out.
What are suitable components for a sensory bottle?
You can incorporate a variety of materials into a sensory bottle. This could encompass glitter, beads, sequins, oil, water, food coloring, and more. The key is to select items that will create an intriguing and engaging sensory experience.
Are sensory bottles safe for infants?
While sensory bottles can be safe for infants, it is crucial to ensure that the bottle is securely sealed to prevent the contents from spilling out. Furthermore, the bottle should be resilient enough to withstand being dropped or thrown.
How do you properly clean a sensory bottle?
The exterior of a sensory bottle can be cleaned with a damp cloth. If the interior becomes dirty or cloudy, it is best to replace the contents.
Can sensory bottles be beneficial for adults?
Indeed, sensory bottles can be advantageous for adults as well. They can be utilized as a stress relief mechanism or as a means to practice mindfulness.
What is the typical lifespan of sensory bottles?
The lifespan of a sensory bottle can fluctuate depending on the materials utilized and how well it is maintained. Regularly inspecting the bottle for any indications of damage and replacing the contents when necessary can assist in prolonging its life.
Is it permissible to include food items in sensory bottles?
While it is feasible to include food items in sensory bottles, it is generally not recommended as they can spoil or mold over time.
What causes a sensory bottle to become cloudy?
A cloudy sensory bottle could be attributable to the type of filler utilized or the quality of the water. Utilizing distilled water and refraining from utilizing fillers that can absorb water, such as salt or sugar, can assist in preventing this.
Is it acceptable to utilize a glass bottle for my sensory bottle?
While glass bottles can be utilized for sensory bottles, they are generally not recommended, particularly for young children, due to the risk of breakage. Plastic bottles are frequently a safer alternative.

Final Fun Fact:
In conclusion, crafting DIY sensory bottles can be an enjoyable and inventive means to provide sensory stimulation for children. With limitless possibilities for colors, textures, and themes, DIY sensory bottles are a versatile tool for sensory play and relaxation. Commence crafting your own sensory bottle today!

