
Share This Article
Table of Contents
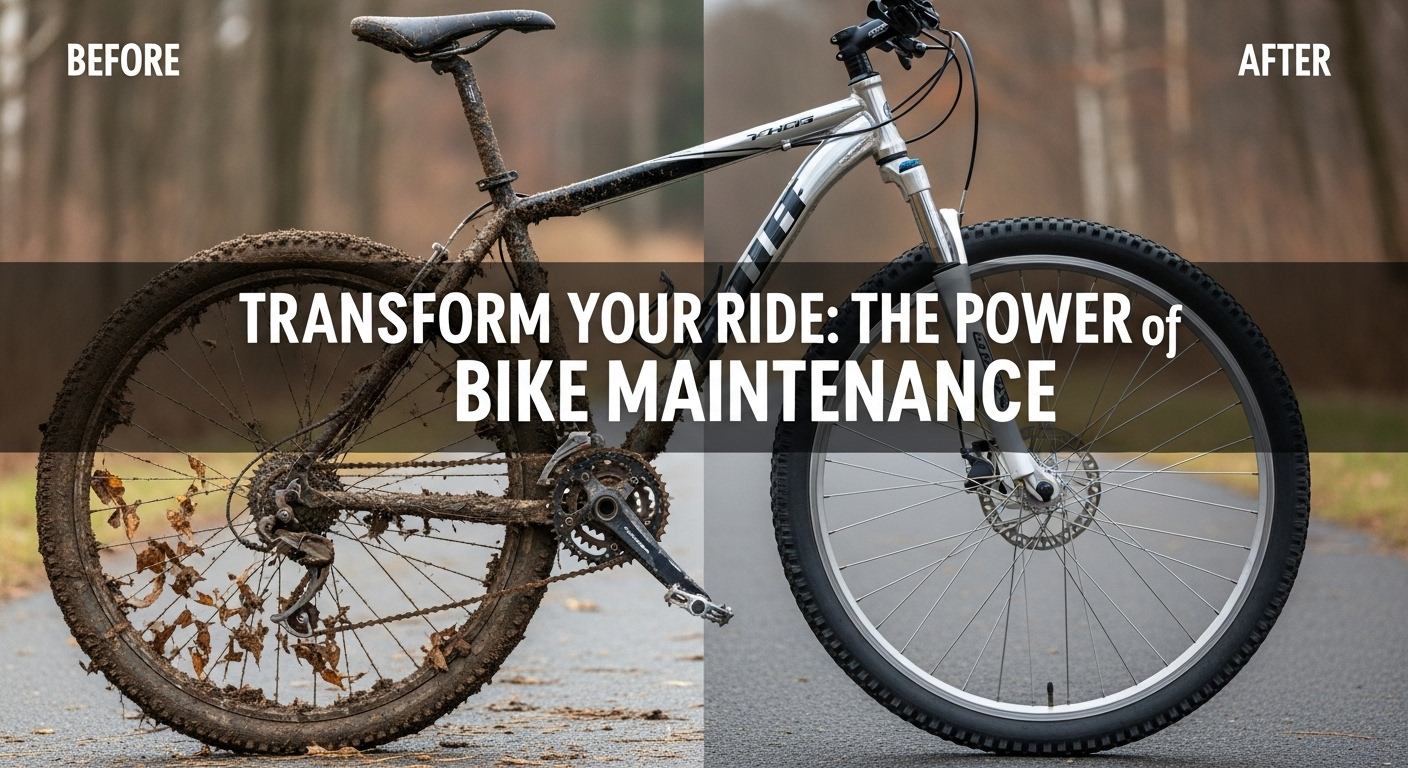
Unlock the secrets to optimal bicycle performance! These essential bike maintenance tips will ensure your ride is always smooth and safe. Consistent bicycle upkeep might seem challenging at first, but it’s a critical element in guaranteeing a secure and enjoyable cycling experience. Whether you’re preparing your bike for the colder months or getting ready for warmer weather, regular maintenance guarantees reliability and extends its service life. In this guide, we’ll delve into the most effective methods for maintaining your bicycle in prime condition, using a systematic approach that addresses each component.

The Foundation: Why a Clean Bicycle Matters
A spotless bike is much easier to assess and service. Always initiate your maintenance efforts by completely cleaning and degreasing your bicycle. This process eliminates dirt and simplifies the identification of any signs of wear or damage. Use specialized bicycle cleaning products and tools to prevent component damage.
Advertisement
🔥 Fast & Free Download

Step-by-Step Bicycle Maintenance Procedures
Become proficient in bicycle maintenance through our detailed, step-by-step instructions, which include everything from basic inspections to advanced troubleshooting techniques, ensuring peak performance.
The “M-Check” Method: A Systematic Inspection Approach
The “M-Check” provides a simple method for inspecting your bike thoroughly. Visualize tracing the letter “M” across your bicycle, starting at the front wheel, moving up to the handlebars, then down to the bottom bracket, up again to the seat post, and finally to the rear wheel. This method ensures you examine every crucial part.
Front Wheel
- Tires: Check for cuts, punctures, and general wear. For those using tubeless setups, monitor sealant levels, as it tends to dry out.
- Rims: Examine for any damage or uneven wear, especially important for rim brakes, which can create a concave surface over time.
- Wheel Trueness: Rotate the wheel and observe for any wobbling. Tighten any loose spokes and adjust the wheel as necessary.
- Bearings: Grip the fork and gently rock the wheel from side to side to detect any play in the hub bearings. Replace sealed bearings if they feel rough or loose.

Handlebars and Stem
- Bolts: Confirm that all bolts on the stem and handlebars are tightened uniformly. Loose bolts can lead to instability.
- Headset: Assess steering smoothness by turning the handlebars from side to side. Check the bearings for any signs of rust or wear, and replace them if needed.
- Handlebar Tape or Grips: Replace worn or moldy handlebar tape to improve grip and comfort while riding.
Brakes
- Rim Brakes: Check the brake pads for wear. Most pads feature grooves or indicators that signal when it’s time for replacement.
- Remove any debris stuck in the pads to prevent damage to the rim’s surface.
- Disc Brakes: Inspect the pads, making sure there is sufficient material remaining.
- Verify the alignment and proper functioning of the brake calipers and pistons.

Bottom Bracket and Chainset
- Bottom Bracket Bearings: Rotate the cranks to assess smoothness. Detach the chain to isolate the bottom bracket’s movement.
- Replace the bearings if they feel rough or stiff during rotation.
- Chainrings: Look for wear, sharp edges, or irregular gaps between the teeth.
- Tighten the chainring bolts to prevent them from loosening during rides.
Rear Wheel
Reiterate the front wheel inspection steps for the rear wheel. Give particular attention to:
- Freehub Bearings: Ensure they rotate freely without any grinding sensations.
- Cassette: Look for worn teeth that could negatively impact shifting performance.

Maintaining the Drivetrain: Chain, Cassette, and Derailleur
A meticulously maintained drivetrain minimizes wear on costly components and ensures effective power transmission.
Amazing DIY Ideas

Chain
- Chain Wear: Employ a chain checker tool to measure the chain’s wear. Replace the chain if it exceeds 0.5 to prevent damage to the cassette and chainrings.
- Lubrication: After cleaning, apply a bicycle-specific chain lubricant. Wipe off any excess lubricant to prevent it from attracting dirt.

Cassette
Inspect the cassette for any indications of wear. Worn teeth might cause the chain to skip or slip, diminishing efficiency.
Derailleurs
- Alignment and Function: Shift through all gears to confirm the derailleurs are correctly aligned and operating smoothly.
- Cables and Housing: Replace any frayed or corroded cables to preserve precise shifting capabilities.
Caring for Contact Points: Saddle, Seatpost, and Pedals
The comfort and safety of your ride hinge on properly maintained contact points.
Saddle and Seatpost
- Seatpost Maintenance: Periodically remove the seatpost and apply grease to prevent it from seizing within the frame.
- Saddle Rails: Check for any creaking or movement. Apply grease to the rail clamps if necessary.

Pedals
- Bearings: Rotate the pedals to ensure they move smoothly. Tighten or replace the bearings if needed.
- Cleats: Inspect clipless pedal cleats for wear and confirm they engage securely.
Final Checks: Examining for Small Issues
After finishing the M-Check, review the bike to make sure no details have been overlooked:
- Accessories: Check the condition of lights, fenders, and racks.
- Bolts and Fasteners: Confirm all bolts are tightened to the manufacturer’s specifications using a torque wrench.
- Test Ride: Take a quick ride to ensure everything is functioning as expected.
Troubleshooting Common Bicycle Problems
Even with regular maintenance, problems can still occur. Here’s how to identify and resolve some of the most frequent issues.
Squeaky Brakes
- Cause: Squeaking is often due to contamination (oil, dirt) on the braking surface or misaligned pads.
- Solution: Clean rim braking surfaces using isopropyl alcohol or a specialized brake cleaner.
- Lightly sand the brake pads to eliminate any embedded debris.
- Adjust the brake pad alignment to ensure even contact with the rim or rotor.
Slipping Gears
- Cause: A worn chain or cassette, or a poorly adjusted derailleur.
- Solution: Use appropriate tools to check the wear on the chain and cassette.
- Adjust the derailleur cable tension. Turn the barrel adjuster clockwise or counterclockwise to fine-tune the shifting.
Creaking Noises
- Cause: Commonly caused by loose bolts, dry bearings, or ungreased components.
- Solution: Inspect and tighten bolts on the stem, handlebars, seatpost, and crankset.
- Remove components like the bottom bracket, clean, grease, and reinstall them.
Flat Tires
- Cause: Punctures from road debris or worn-out tire sidewalls.
- Solution: Patch small punctures in the inner tubes or replace them if they are significantly damaged.
- Check and replace tires that are worn or damaged. For tubeless setups, refresh the sealant regularly.

Advanced Drivetrain Care
The drivetrain is crucial for your bike’s performance. Here’s how to maintain its smooth and efficient operation.
Deep Cleaning
Periodically, perform a thorough cleaning of your drivetrain parts.
- Remove the Chain: Use a quick link or chain breaker tool to detach the chain.
- Soak the chain in degreaser to remove accumulated grime.
- Clean the Cassette and Chainrings: Use a brush or rag to remove dirt and grease from the teeth.
- For stubborn grime, use a solvent and scrub with a toothbrush.
- Reassemble and Lubricate: Reinstall the chain and apply lubricant evenly. Wipe off any excess to prevent dirt from sticking.
Derailleur Hanger Alignment
A misaligned derailleur hanger can result in poor shifting performance.
- Use a derailleur hanger alignment tool to check and straighten the hanger.
- Carefully align the hanger to ensure smooth shifting and minimize drivetrain wear.
Preparing Your Bike for Specific Conditions
Adjust your maintenance routine to accommodate seasonal or environmental changes. Proper preparation ensures the best possible performance in various riding conditions.
Winter Riding
- Fenders: Install full-coverage fenders to protect yourself and your bike from water and mud.
- Lubrication: Use a wet lubricant to withstand rainy and muddy conditions.
- Tires: Consider switching to wider tires with enhanced grip for wet or icy roads.
- Frame Protection: Apply protective tape to areas susceptible to dirt and grit accumulation, like the downtube and chainstays.
Summer Riding
- Dry Lubrication: Switch to a dry lubricant that does not attract dust.
- Heat Checks: Inspect tires for cracks or wear worsened by high temperatures.
- Hydration and Storage: Equip your bike with bottle cages and store it away from direct sunlight to protect the frame and components.
Mountain Biking
- Suspension Maintenance: Regularly clean the suspension seals to prevent grit buildup.
- Adhere to the manufacturer’s guidelines for suspension servicing intervals.
- Tires and Tubeless Setup: Use low-pressure tubeless tires for superior traction on uneven terrain.
- Regularly refresh the sealant and check for punctures.
Maintaining High-Performance Components
For competitive cyclists, specific components require extra attention to ensure top performance.
Carbon Frames and Components
- Inspect for Damage: Regularly check for cracks or dents in carbon frames and components. Even minimal damage can compromise structural integrity.
- Clean Carefully: Use mild soapy water to avoid scratching delicate carbon surfaces.
- Torque Settings: Always tighten bolts to the manufacturer-recommended torque to prevent overtightening or damaging the material.
Electronic Shifting Systems
- Battery Maintenance: Charge batteries before they are completely depleted to avoid interruptions during rides.
- Keep spare batteries available for extended trips.
- Firmware Updates: Regularly check for updates to ensure optimal performance of the electronic shifting system.
Disc Brakes
- Rotor Inspection: Check for warping or uneven wear on rotors. Replace them if needed.
- Clean the rotors with isopropyl alcohol to maintain braking efficiency.
- Brake Fluid: For hydraulic disc brakes, flush and replace the brake fluid according to the manufacturer’s recommendations.
Pro Tips for Long-Term Maintenance
- Make a Schedule: Create a maintenance schedule to perform routine checks, cleanings, and replacements.
- Keep a Tool Kit Handy: Essential tools include tire levers, a multi-tool, a chain checker, and a pump.
- Invest in a torque wrench for precise tightening.
- Learn Basic Repairs: Familiarize yourself with fixing a flat tire, replacing a chain, and adjusting brakes and gears.
Final Wording: The Benefits of Consistent Upkeep
Bicycle maintenance may initially feel like a task, but it will become routine over time. A well-maintained bicycle performs better, lasts longer, and ensures safer, more enjoyable rides. Whether you’re an occasional rider or a seasoned cyclist, regular care keeps your bike in peak condition, ready for any terrain or weather.
By following these tips, you can confidently manage your bicycle’s maintenance and extend its lifespan. Happy riding!
Frequently Asked Questions About Improving Your Bike Maintenance
Explore our essential FAQs for smoother rides, enhanced safety, and an extended bike lifespan through improved maintenance.
1. How often should I check or service my bike components?
For frequent riders, inspect and service your bike every few weeks, especially after riding in wet or muddy conditions. Seasonal riders or casual cyclists should aim for a comprehensive check every 1,000–1,500 miles or annually.
2. What parts of the bike should be lubricated?
Concentrate on the chain, derailleur pivots, and cables. Avoid excessive lubrication, as it attracts dirt. Use grease for bearings, seatposts, and pedal threads. Always wipe away excess lubricant after application.
3. Is it safe to use a pressure washer to clean my bike?
Pressure washers can force water into bearings, leading to rust. Instead, use a gentle hose spray or a damp cloth with mild soap. If you use a pressure washer, re-lubricate all exposed parts afterward.
4. How do I address rust on my bike’s drivetrain?
Clean rust-affected areas with a brush and apply a mild degreaser. Rinse and dry thoroughly before lubricating. Prevent future rust by cleaning and lubricating regularly, especially after wet rides.
5. Can I turn my bike upside down for repairs if I don’t have a stand?
While possible, avoid it with high-end bikes, as it risks damaging the shifters. Instead, invest in an affordable bike stand or create your own for safe and efficient maintenance.
6. How can I tell if my chain or cassette needs replacing?
Use a chain checker to measure wear. If the chain stretches beyond 0.5, replace it to prevent cassette damage. Inspect cassette teeth for sharpness or uneven wear, indicating the need for replacement.
7. What is the best way to clean my bike’s bearings?
Remove bearings and clean them with a degreaser applied to a cloth. Avoid submerging or pressure washing them. Re-grease and reassemble for smooth operation.
8. What should I do if my gears are slipping?
Inspect the chain and cassette for wear and adjust derailleur tension using the barrel adjuster. If slipping persists, check the derailleur hanger alignment and replace cables if worn.
9. Why is my rear wheel wobbling, and how can I fix it?
A wobbling wheel typically indicates loose spokes or untrue rims. Use a spoke tool to tighten spokes evenly, but consider professional truing if wobbling persists.
10. What should I do before riding a new bike?
Check all bolts, adjust the saddle and handlebars, and inspect tire pressure. Lightly lubricate the chain and test the brakes. Utilize the complimentary tune-up after your first 50 miles to address any settling issues.

