
Share This Article
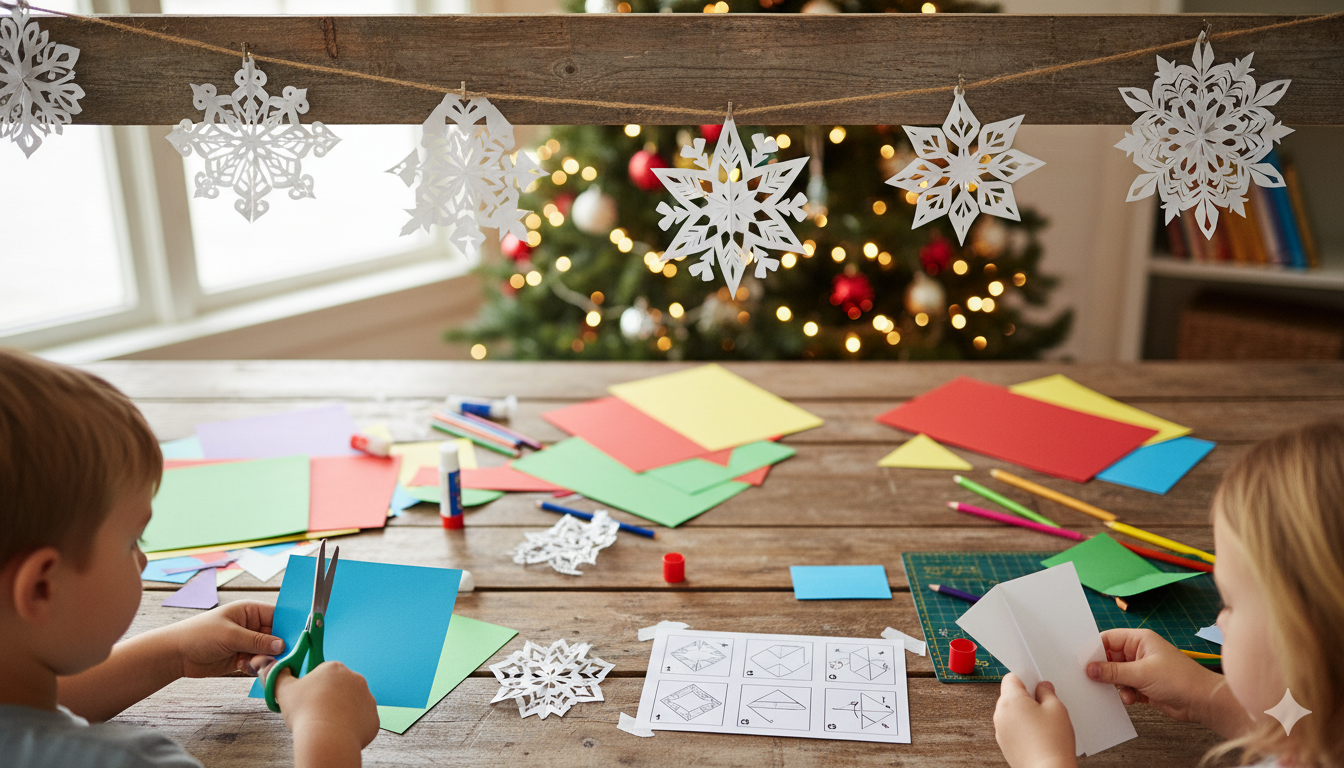
Making a DIY paper snowflake Christmas garland is a fun and delightful project, especially for kids! This charming decoration brings the magic of winter indoors, transforming your space into a festive wonderland. Plus, it’s a great way to bond with your little ones while crafting something beautiful together.
Gather Your Supplies
Before starting your snowflake garland, gather all the materials you need. You will require:
Advertisement
🔥 Fast & Free Download

- White and colored paper
- Scissors
- String or twine
- Glue or tape
- Pencil
Having everything ready will make the process smoother and more enjoyable!
Helpful Preparation Tips
- Choose a workspace with good lighting.
- Consider using a cutting mat for safety.
- Keep a small trash bag nearby for scraps.

Create the Snowflakes
Start by folding your paper into squares. A good size is about 6×6 inches. Once folded, use your scissors to cut out shapes, but remember to keep the center intact. Unfolding the paper will reveal your unique snowflake. Encourage creativity by trying different patterns and sizes!
Helpful Cutting Tips
- Use various paper colors for a vibrant look.
- Experiment with circular and star shapes.
- Cut slowly and carefully for better results.

Stringing the Snowflakes
Once you have several snowflakes, it’s time to string them together. Use your string or twine and decide how far apart you want each snowflake to hang. Attach the snowflakes with glue or tape, ensuring they are secure. This step is where your garland starts coming together!
Helpful Stringing Tips
- Make a pattern with colors for visual appeal.
- Use a long piece of string to create a fuller look.
- Consider adding beads or stars between snowflakes.
Hang Your Garland
Your garland is almost ready! Choose a spot to hang it that brings joy to the room. Great places include mantels, doorways, or even across windows. When hanging, make sure it’s visible but not in the way. Adjust the length as needed to fit your space perfectly.
Helpful Hanging Tips
- Use removable hooks for easy installation.
- Hang at eye level for the best effect.
- Consider adding lights for a magical touch.
Involve the Kids
Letting children help with the crafting process makes it even more special. They can choose colors, cut shapes, and help with the hanging. This project allows kids to express their creativity while learning basic crafting skills. Plus, it’s a wonderful way to create lasting memories!
Helpful Involvement Tips
- Set up a crafting station with all supplies.
- Encourage them to personalize their snowflakes.
- Make it a fun competition for the best design.
Make It a Family Tradition
Consider making this snowflake garland a family tradition. Each year, everyone can create new snowflakes to add to the garland. Over time, you’ll have a beautiful collection of memories that you can hang up together during the holiday season.
Helpful Tradition Tips
- Store the garland carefully to reuse each year.
- Take a photo each time to document the process.
- Involve grandparents or relatives for extra fun.
Room Placement Suggestions
Your snowflake garland looks lovely in various spaces. Here are some great places to showcase it:
- Living Room: Hang above the fireplace for a cozy feel.
- Kitchen: Adorn the windows for a cheerful vibe.
- Kids’ Room: Create a winter wonderland theme.
Conclusion
Creating a DIY paper snowflake Christmas garland is a joyful and simple project that’s perfect for kids and families. It fosters creativity and teamwork while bringing festive cheer to your home. So gather your supplies, get crafting, and enjoy the magic of the season together!

