
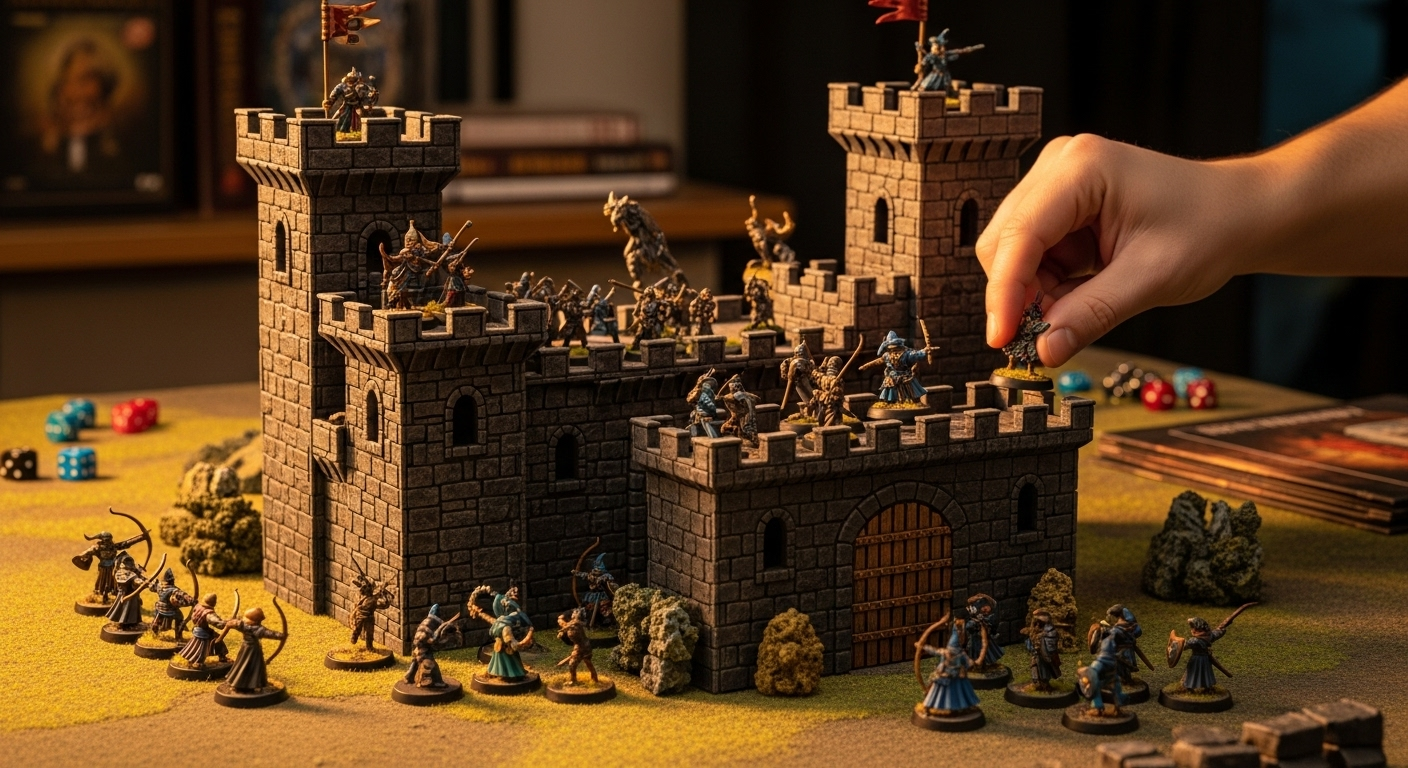
Embarking on a DIY foam castle project offers immense satisfaction, especially for those immersed in tabletop gaming, diorama creation, or the fantasy genre. Constructing a custom modular castle allows you to develop a completely unique and interactive terrain piece. This guide delivers comprehensive instructions for building a detailed and captivating foam castle, featuring elements like flickering LED torches, spiraling stairways, authentic textures, and adaptable sections for easy assembly and rearrangement. Regardless of your experience level with foam crafting, this tutorial empowers you to realize your vision of a formidable stronghold!

Essential Materials and Tools
Before you commence building your personalized castle, gather the necessary tools and materials. These resources are crucial for effectively manipulating foam, creating textured surfaces, and adding intricate details.
Cutting Implements:
- Proxxon Hot Wire Cutter
- Hot Knife Foam Cutter
- OLFA Utility Knife equipped with Ultra-Sharp Blades
- X-ACTO Knife and an assortment of Blades
Construction Components:
- 1/2″ XPS Foam
- Epoxy Putty (Greenstuff) specifically for detailed sculpting
- Robust Magnets designed for modular connections
- Gorilla Glue Sticks accompanied by a Glue Gun
- Aleene’s Tacky Glue perfect for affixing smaller components
- Mod Podge utilized for sealing surfaces
- Vallejo Paint Set (16 colors) tailored for detailed painting
- Krylon Matte Finish Spray ensuring a lasting protective layer
These supplies will enable you to effortlessly cut, mold, and texture the foam, ensuring your castle boasts both durability and structural integrity.
Detailed Construction Process
Discover how to construct a DIY castle using these detailed instructions, covering everything from base preparation to incorporating finishing details and gameplay elements.
1. Laying the Groundwork: Base Preparation
Begin with the primary base of the castle, offering essential structure and a solid foundation for gameplay.
- Acquire Plans: Obtain castle blueprints from resources like DriveThruRPG, often available in a large format (24”x36”) for comprehensive layouts. This tutorial assumes you have a plan but allows for dimensional adjustments to suit your preferences.
- Cut the Initial Base: Utilize the hot wire cutter to precisely cut a large piece of XPS foam according to your base dimensions.
- Outline the First Floor: Position the printed template onto the foam, tracing the perimeters of walls, towers, and floor partitions. This ensures accurate cuts and maintains the integrity of the design.
- Excise Wall Sections: Clearly mark and carefully cut out the designated wall segments, including openings for doors, windows, and entry points. Aim for wall heights between 2.5 and 3 inches to achieve a realistic castle scale.

This preliminary setup provides the essential framework needed to begin building the castle’s core structure.
2. Assembling the Castle Walls
Constructing strong, textured walls is vital for achieving a lifelike and functional castle appearance.
- Precisely Cut Wall Profiles: Employ your hot wire cutter to carefully cut along the marked wall shapes. Maintain consistent cuts by using a low to medium heat setting (approximately 1.5-2 on a Proxxon cutter).
- Apply Wall Texturing: Prior to wall assembly, impart texture to each piece using crumpled aluminum foil. Firmly press the foil against the foam surface to create the illusion of stone.
- Inscribe Stonework Patterns: Utilize an X-ACTO knife to meticulously carve stone patterns into the foam. Subsequently, use a pen to enhance and define these lines, creating a durable and visually appealing stone-like surface.
- Secure Wall Connections: Adhere the walls together using hot glue. To augment structural stability, incorporate small pieces of scrap foam as reinforcements at the joints. Toothpicks can further strengthen these connections.

By texturing and adding details to the walls, you’ll cultivate a convincing stone effect that elevates the castle’s imposing presence.
3. Crafting the Castle Gateway and Entrance
The entryway is a prominent visual element of any castle, demanding a striking and memorable design.
- Design the Main Gate: For the gate structure, cut a rectangular piece of foam that corresponds to the dimensions specified in your castle plans. Trace this shape onto the front wall, allowing an extra layer to create added depth.
- Inscribe Gate Details: Using an X-ACTO knife, etch a pattern that emulates wood grain onto the foam surface. Incorporate vertical lines to represent planks and add small dots or indentations to simulate nail heads.
- Enhance Gate Dimension: Bond multiple layers of foam together to fabricate a recessed, three-dimensional effect for the gate, enhancing its perceived strength and presence.
- Refine Doorway Details: For heightened realism, introduce metal-like details by cutting small foam pieces for brackets and studs. If available, use epoxy putty to sculpt door handles or hinge elements for added character.

Upon completion, the gate will serve as a majestic entrance, adding authenticity and emphasizing the scale of your fortress.
4. Building Towers and Parapets
Towers and parapets contribute significant height and defensive positions to a castle, enhancing its visual appeal.
- Shape Tower Sections: Cut cylindrical sections for the towers. For increased stability, consider inserting a wooden skewer through the foam layers to maintain alignment and prevent warping.
- Curve Foam for Circular Towers: Make shallow grooves on the inner side of the foam pieces to increase their flexibility. After bending them to the desired shape, secure them with hot glue and reinforce with toothpicks or pins.
- Attach Parapets: Create square parapet pieces and affix them to the top of each tower. Ensure they are textured with the same foil technique used on the walls for a cohesive aesthetic.
- Incorporate Magnets for Modularity: Attaching magnets to the corners of the parapets and tower sections enables easy removal and reattachment. Carefully verify magnet polarities before gluing them in place.

The modularity of towers and parapets not only enhances functionality but also allows for diverse castle configurations during gameplay.
5. Detailing: Windows, Doors, and Staircases
Small details breathe life into the castle, promoting interactivity within gaming scenarios.
- Create Window Openings: Use an X-ACTO knife to carefully cut window shapes into each wall. For a realistic effect, cut only halfway through the inner side to create a recessed appearance. Add bars or grills to simulate medieval prison cells or defensive window features.
- Construct Stairs and Interior Elements: Fabricate a winding staircase by stacking small foam pieces, cutting each to the appropriate size, and gluing them together. Etch flagstone patterns onto each step for added texture.
- Design a Jail Cell: Underneath the stairs, consider incorporating a small jail cell. Add details such as toothpick bars for windows and small handles made of epoxy putty. These enhancements make the castle playable across multiple levels.

These intricate elements enhance the castle’s interactive capabilities, making it ideal for enriching tabletop gaming experiences.
6. Applying Paint and Textures
Painting is a vital step to unify all components of the build and create a polished final appearance.
- Seal the Foam Surface: Begin by applying a coat of Mod Podge mixed with a small amount of black paint to seal the foam and establish a base layer. This mixture strengthens the foam and provides a foundational color that adds depth to subsequent paint layers.
- Apply Base Coat and Dry Brush Techniques: Use a gray or stone color for the base coat. Once dry, use a lighter gray to dry brush the surface, accentuating the texture. Apply dry brushing in a downward motion for a realistic weathered effect.
- Apply Black Wash for Depth: For added depth, apply a black wash over the entire castle structure. This helps the recessed areas stand out and introduces shadowing for a lifelike appearance.
- Incorporate Rust and Moss Effects: Use green, brown, and red paints for weathering effects. Lightly apply these around windows, doors, and parapets to simulate rust and moss accumulation. Apply additional wash as needed to achieve a natural look.

These techniques will help you achieve a believable stone texture, complete with indications of aging and wear, giving your castle an authentic feel.
7. Implementing Final Enhancements
With the primary construction finished, it’s time to incorporate the intricate details that bring the castle to life. These additions will enhance the realism and make your build truly remarkable.
Illuminating the Castle with LED Torches
Adding LED torches can create an immersive ambiance by simulating flickering candlelight, making the castle appear vibrant and active.
- Select LED Lighting: Small, flickering LEDs are best suited for this purpose. Battery-operated options offer mobility and ease of use.
- Drill Torch Holes: Determine where you want to position the torches, such as near doorways, windows, or the main hall. Use a heated pin to carefully create holes in the foam where the lights will be inserted.
- Install the LEDs: Once the holes are prepared, insert the LEDs and secure them with a small amount of hot glue. Ensure they are not too tightly fixed, as you may need to remove or replace them later.
- Conceal the Wiring: If the LEDs have visible wires, use foam or textured pieces to cover them. Alternatively, paint the wires with black or gray paint to blend them into the castle wall.

These LED torches contribute a beautiful ambient glow and make the structure feel alive, enhancing both display and gameplay experiences.
Constructing a Chimney Feature
A chimney adds character and serves as a subtle yet visually appealing detail on the castle.
- Utilize a Straw or Small Tube: To create the chimney, use a plastic straw or similar small tube and cut it to your desired length. Bend it slightly to give it an aged, worn appearance.
- Craft Hot Glue Smoke Details: To simulate a “smoke” effect, add small blobs of hot glue around the top of the straw. Allow the glue to dry slightly as it drips to mimic a wisp of smoke.
- Incorporate Bands and Rivets: Wrap a thin strip of green epoxy putty around the straw to create bands that resemble metal rivets. Use a needle or pin to create small indentations that look like bolts.
This chimney adds a touch of realism to the top of your castle and provides an excellent opportunity to practice detailing techniques.
Designing a Dungeon or Jail Cell
Adding a dungeon or jail cell introduces drama and narrative elements to your build, particularly valuable for tabletop gaming applications.
- Construct Bars with Toothpicks: Cut toothpicks to the appropriate length and insert them into a window to create a barred effect. Hot glue can secure them in place.
- Paint the Bar Structures: Use metallic paints to color the toothpicks, giving them the appearance of aged iron. A black or brown wash can impart a rusty effect.
- Add Dungeon Props: Small props, such as chains, skeletons, or rats (made from epoxy putty or small toys), can make the dungeon feel occupied and menacing.

The dungeon will create a focal point for players, sparking story ideas and giving the castle a dark, hidden history.
Flags and banners give your castle a personalized touch, representing its allegiance, heritage, or a player’s faction in a game.
- Utilize Fabric or Paper: Cut small strips of fabric or sturdy paper into flag shapes. Tattered edges contribute to a worn look, ideal for a medieval fortress.
- Paint Decorative Designs: Add symbols, colors, or heraldry to the banners to give the castle a backstory. You can hand-paint these details or use small printed stickers for precise designs.
- Secure to the Castle Structure: Use a toothpick or barbecue skewer as a flagpole, painting it to resemble wood or metal. Insert it securely into the foam, either on the parapets or near windows.
Banners are a small but impactful detail, adding a touch of personality and hinting at the story behind your castle.
Incorporating Moss and Weathering Effects
Weathering gives your castle a “lived-in” appearance, as though it has endured the elements for years. This step enhances realism and adds depth to the overall creation.
- Applying Moss Elements: Mix PVA glue with green flocking to create moss. Dab this mixture around corners, window sills, and cracks to simulate moss growth. Once dry, it will look natural and add texture.
- Black Pigment for Soot Detailing: Use black pigment powder to simulate soot effects on areas like chimneys and above torches. Lightly brush the pigment to achieve a smoky appearance.
- Creating Rust Effects: Fabricate a rust effect by mixing red, brown, and black paints with water. Dab the mixture around metal areas like door hinges, bars, or torch holders, allowing the paint to drip naturally.
These weathering effects enhance the texture and details, making the castle look aged and more realistic.
8. Assembly and Playability Characteristics
Constructing the castle with modular components allows for flexible gameplay and ease of transport.
- Employ Magnets for Modular Features: Large magnets placed at each corner of removable sections allow for easy disassembly and reconfiguration. Verify magnet polarity before gluing to prevent repulsion between sections.
- Create Stackable Sections: Design each floor to be removable, enabling access to all areas. Add floors and roof sections that fit securely on top of walls and towers.
- Design Swappable Sections: Create extra pieces, such as broken walls, that can be swapped in during gameplay to create a dynamic environment. These pieces can add a damaged, war-torn look or reflect a change after a battle.
These modular features enhance the castle’s versatility for gaming scenarios and simplify transport without compromising the design.

9. Display and Maintenance Guidelines
Following your hard work, maintaining and displaying your castle will ensure it looks great for years to come.
- Apply a Matte Sealer Application: To protect your paint job, use a matte spray sealer such as Krylon Matte Finish. This will keep colors vibrant and shield against minor wear.
- Dust the Display Regularly: Use a small, soft brush to remove dust from detailed areas like torches, flags, and moss. Avoid wet cleaners, as they can damage the foam.
- Storage Recommendations: When not in use, store the castle in a dust-free location, ideally in a clear plastic box, to protect it from accidental damage.
With these care steps, your foam castle will continue to look impressive and remain ready for action whenever you need it.
Concluding Thoughts:
Constructing a DIY foam castle is a fulfilling endeavor that blends artistic expression, craftsmanship, and engineering principles. By adhering to these steps, you’ll create a modular, richly detailed fortress that is both functional and visually
FAQs About How to Make a DIY Castle
Explore FAQs on making a DIY castle! Discover tips, materials needed, and step-by-step guidance to build your own castle masterpiece.
1. What type of foam is recommended for this build?
XPS foam (Extruded Polystyrene) is recommended for durability and ease of cutting. You can find XPS at home improvement stores like Home Depot or Lowes. Ensure you remove any plastic film on both sides before cutting. Some builders also use Foamular R-5 insulation foam for similar results.
2. How do I scale the plans down if I want a smaller castle?
Take the files to a print shop and request scaling to your desired size. Most projects are scaled to match 28mm miniatures but can be resized to suit your needs. For printing smaller versions, aligning red “X” marks may be necessary if using multiple 11×17-inch sheets.
3. What size magnets work best for modular builds?
For modularity, 6mm x 3mm magnets are commonly used. They provide a good hold for stacking sections but ensure you align polarities correctly. If looking to reduce costs, you can use magnets only on one piece and a metal tack on the other.
4. How can I curve foam for rounded towers or walls?
To curve foam without breaking, make close, shallow cuts on one side of the foam and gently bend it. This method keeps the foam from snapping and gives you a smooth curve. Apply hot glue in the grooves to hold the curved shape firmly once positioned.
5. Are the walls playable from the inside?
Yes, the castle walls are designed to be low (about 1 inch) for interior divisions, allowing visibility and accessibility without obstructing player sight lines. This makes it easy to navigate characters within each room or level.
6. What type of paint and sealant should I use?
After texturing and painting the foam, use a Krylon Matte Finish spray to seal the paint. For realistic colors, use black and brown washes for weathering, and highlight edges with light gray or stone colors for depth.
7. Can I make the stone texture roller myself?
Yes, a stone roller can be DIY-made or purchased. A video tutorial on crafting this tool is available on the creator’s channel, or you can buy one from specialty stores like ShiftingLands.
8. What scale is typically used for these builds?
Most of the builds are in 28mm scale, aligning with common tabletop miniatures. This scale is approximately 1:64, but if you need a different size, ask a print center to adjust the plans accordingly.
9. Any tips for adding unique details like eyes in the sewer?
Small touches, like painting tiny eyes in dark areas, enhance the realism and intrigue of the castle. Use black cardboard with small yellow dots to build the illusion of creatures lurking in the shadows—great for player immersion.

